In this blog post I will try to show how we can build nested VCF 4.1 lab!
My Physical Server specs
- Lenovo ThinkAgile MX Certified Node
- 2 Intel(R) Xeon(R) Gold 6140 CPU @ 2.30GHz
- 384 GB RAM

Physical Networking Requirements
- Set vSwitch MTU on your lab host to 9000
- Create a new port group on the vSwitch for the nested VMs and change VLAN to 4095 to allow for VLAN trunking and ensure Promiscuous Mode, MAC Address Changes & Forged Transmits are all set to Accept.

VCF Jump Server Requirements
- I am using Windows Server 2019 as DNS and NTP.
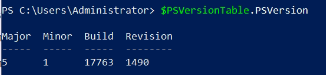
- PowerShell 5.1+ => check that using > $PSVersionTable.PSVersion
- PowerCLI 11.3+ => run this PowerShell command as admin <Install-Module -name VMware.PowerCLI>
- OVFTool 4.3+ => OVFTool download link
- Assign 2 vNICs to the Jump server 1 for local network & 1 for VCF-PG to reach the VCF subnet.

- Configure the vNIC VLAN ID to 10 (adapter type should be VMXNET3 )
- Disable Windows Firewall as recommended.
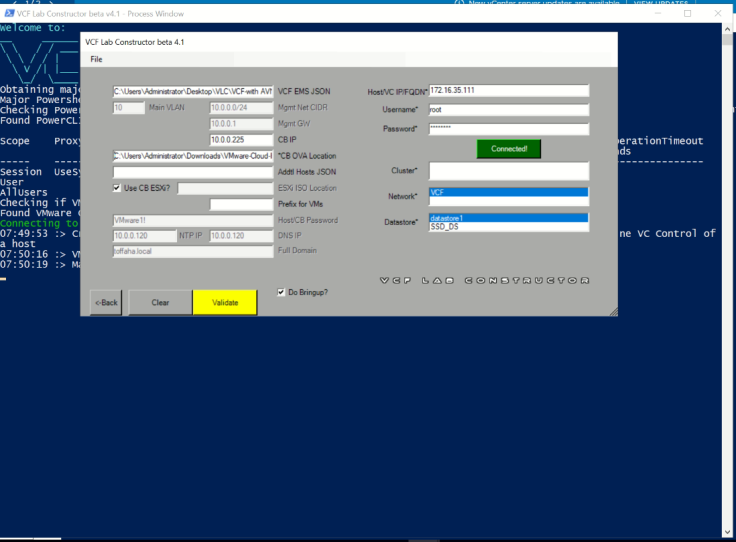
Using the VCF Lab Constructor- Manual Mode
In my environment I will use my own IPs, so I am going to use VLC in manual mode
- VLC Download Link
- VMware Cloud Builder 4.1.0 => download it from https://myvmware.com
- I am using vyos as virtual router to setup BGP thanks @Datareload
- Edit the JSON file with ESXI’s IP, DNS, NTP and don’t forget the Licenses required for VCF 😀
- Fill the required info into VLC PowerShell GUI
- Set Cloud Builder IP then click Validate hit Construct to begin the deployment 😀


Leave a comment